"Pretty in Pink: Elevate Your Manicure Game with Ombre Coffin Nails"
Who says nail art is dead? This year’s hottest trend in nails is none other than the chic and sophisticated Pink Ombre Coffin Nails. If you want to impress and show off unique nails that catch everyone's attention, then ombre nails are a great way to show off your femininity while staying on-trend. Here’s everything you need to know on how to get your perfect pair of pink ombre coffin nails.
1. What are Pink Ombre Coffin Nails?
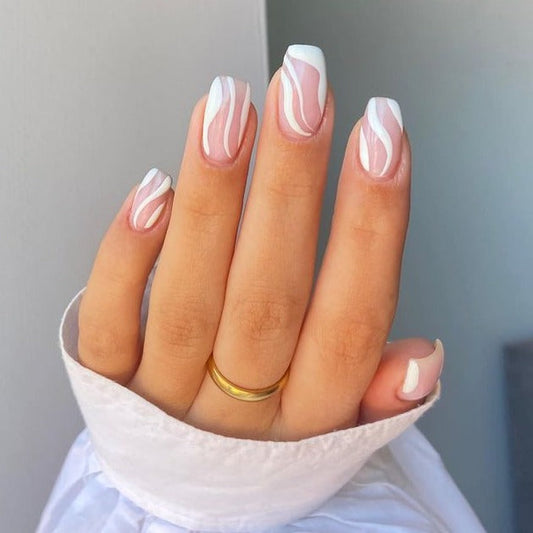
Pink Ombre Coffin Nails, as the name suggests, is a nail design where your nails are painted in shades of pink from lightest to darkest. These nails have a gradually increasing gradient effect that will make your fingers look like a pretty bouquet of soft pink cherry blossoms. It’s a style that’s perfect for any occasion, from weddings to everyday wear.
2. Perfectly Shaped Nails are Key
Before applying the pink ombre polish, your nails need to be in perfect shape. Coffin (or Ballerina) shaped nails are commonly used with this style, which means that the nail edges are filed to be straight and slightly tapered. Once shaped, use a buffing block to smooth the surface of the nail. This will help polish have better adherence to your nails, ensuring a more polished look that lasts longer.
3. Choosing the Right Colors
When it comes to pink ombre nails, the colors you use are important. Start with a base coat in your preferred light shade of pink. Then, choose four to five shades of pink polish in varying hues, each getting progressively darker. The key is to blend each color well to create a subtle gradient effect. Pro-tip: use a makeup sponge to dab and blend the colors easily.
4. Add a Final Coat
Once the colors are all blended together, add a top coat to seal in your stylish pink ombre coffin nails and give them an unforgettable extra dazzle. This not only protects your nail art design, but it will also avoid smudging during your daily routine.
5. An Instagram-Worthy Manicure
Now that your nails are styled to perfection, it’s time to show them off. You’ll want to share your manicure on social media, and with your friends. Take advantage of the pink ombre style by taking a picture with your hand-held flatly over a bouquet of cherry blossoms or place your hand next to some delicate macarons to create a cute pastel vibe.
Wrapping it up.
So, there you have it – five steps to get your perfect pink ombre coffin nails. Whether you’re looking for a sophisticated look for a night out or something that’ll make every day feel like a special occasion, this is the style to try. Just remember to choose the perfect colors, shape and buff your nails to perfection, blend the ombre polish well, and add a final topcoat to seal in your stylish look. Get ready to flaunt your nails and get compliment after compliment, because not everyone can rock a pink ombre coffin nail design.
1. What are Pink Ombre Coffin Nails?
Pink Ombre Coffin Nails, as the name suggests, is a nail design where your nails are painted in shades of pink from lightest to darkest. These nails have a gradually increasing gradient effect that will make your fingers look like a pretty bouquet of soft pink cherry blossoms. It’s a style that’s perfect for any occasion, from weddings to everyday wear.
2. Perfectly Shaped Nails are Key
Before applying the pink ombre polish, your nails need to be in perfect shape. Coffin (or Ballerina) shaped nails are commonly used with this style, which means that the nail edges are filed to be straight and slightly tapered. Once shaped, use a buffing block to smooth the surface of the nail. This will help polish have better adherence to your nails, ensuring a more polished look that lasts longer.
3. Choosing the Right Colors
When it comes to pink ombre nails, the colors you use are important. Start with a base coat in your preferred light shade of pink. Then, choose four to five shades of pink polish in varying hues, each getting progressively darker. The key is to blend each color well to create a subtle gradient effect. Pro-tip: use a makeup sponge to dab and blend the colors easily.
4. Add a Final Coat
Once the colors are all blended together, add a top coat to seal in your stylish pink ombre coffin nails and give them an unforgettable extra dazzle. This not only protects your nail art design, but it will also avoid smudging during your daily routine.
5. An Instagram-Worthy Manicure
Now that your nails are styled to perfection, it’s time to show them off. You’ll want to share your manicure on social media, and with your friends. Take advantage of the pink ombre style by taking a picture with your hand-held flatly over a bouquet of cherry blossoms or place your hand next to some delicate macarons to create a cute pastel vibe.
Wrapping it up.
So, there you have it – five steps to get your perfect pink ombre coffin nails. Whether you’re looking for a sophisticated look for a night out or something that’ll make every day feel like a special occasion, this is the style to try. Just remember to choose the perfect colors, shape and buff your nails to perfection, blend the ombre polish well, and add a final topcoat to seal in your stylish look. Get ready to flaunt your nails and get compliment after compliment, because not everyone can rock a pink ombre coffin nail design.